How To Connect Two Computers Using Ethernet Cable
Some time we need to transfer data from our home PC to our laptop or between laptops, in such situations we may use pen drive. Pen drive is good idea, but more reliable and fast way is connecting 2 computers directly. Two computers can be connected in many ways one of the simplest way is through LAN (RJ45) cable and Ethernet card. This technique also allows us to play multi player games, to host local server. It basically forms a network of 2 computer and enables us to do everything what a network computer allows.
Step 1 Cross Connected Cable
RJ45 cable has 2 form of connections. a) Straight Connection, b) Cross Connection.
Straight connection is used to connect two different devices example computer-modem, computer-printer, computer-switch, etc. cross connection is used to connect same type of devices example computer-computer, switch-switch, etc. Follow this Wikipedia link to know more about crossover cable. We need cross connected cable for this mission, get one from local shop or make your own. Physically connect 2 computer using the cable.
Step 2 Configuring IP and Security setting
The two systems should have different IP of same class. Let us use class C IP which has less no of nodes. Its range is 192.0.0.0 to 223.255.255.255. First 3 octaves(portions separated by dots) represent network part so both systems should have same value in first 3 octaves. The forth octave can take any values between 2 to 254.
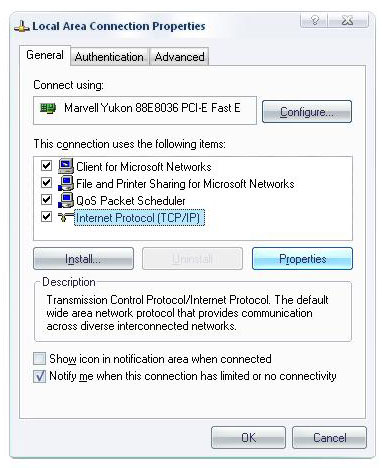
Go to control panal -> Network connections . Then open Local Area connection property. In general tab select Internet Protocol(TCP/IP), then click Properties.
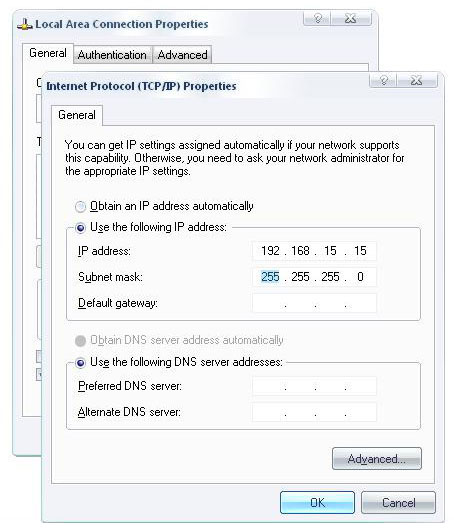
Then in Internet Protocol(TCP/IP) Properties window select Use the following IP address. In IP address box type the IP and then click Tab. Subnet mask will be automatically generated, leave the remaining things blank and click OK twice. Do the same thing for 2 computers with different IP. Example. Let us have first computer IP as 192.168.15.15 and other computer IP as 192.168.15.20. Note: First 3 part have same value.
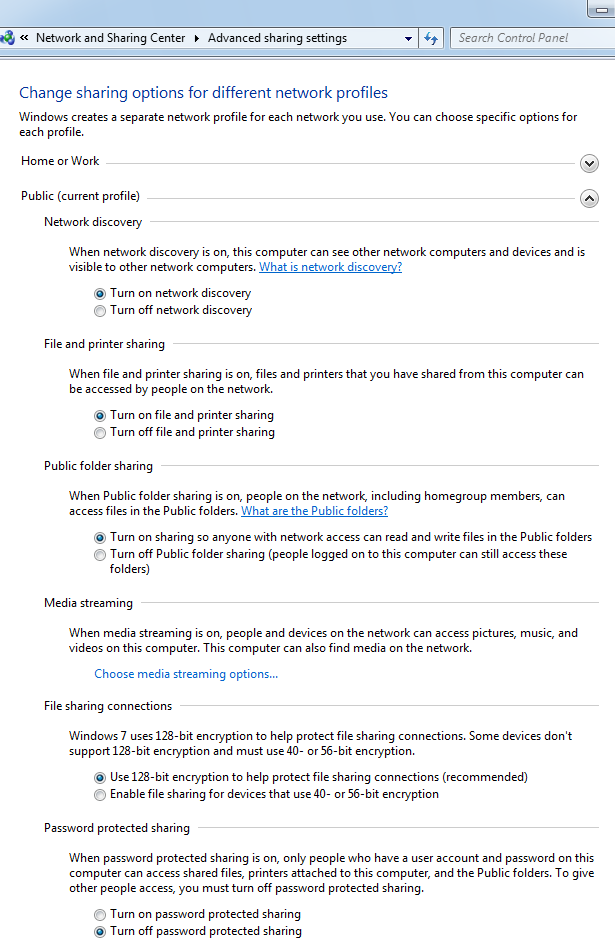
Windows 7 need additional security setting for successful file sharing. Apply following setting in Control Panel -> Network and Sharing Center -> Change advanced sharing setting.
Step 3 Checking Connection
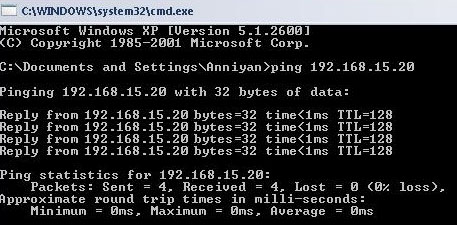
After configuring IP and connecting wire now its time for checking the connection. Go to run type "cmd" and click ok. Comment prompt will open in it type "ping" (other computer IP) and press enter, if 0% Loss is the result, then connection is perfect.
Step 4 Transferring files
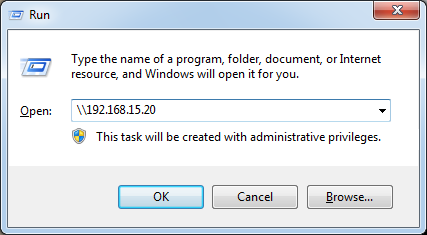
Right click the folder which you want to transfer and click share. Go to Run and type IP of other computer and click ok that's all work over. Happy File Sharing ! !
